Whipped cream can transform even the simplest dessert into a delightful indulgence. With just a few essential ingredients and some basic knowledge, you can create the perfect topping that elevates your culinary creations.
Understanding the difference between various types of cream is crucial to achieving the ideal consistency and flavor in your whipped cream. This guide will take you through everything you need to know, from tools and techniques to storage tips, ensuring your whipped cream is always a success.
Whether you’re looking to impress guests with a homemade dessert or simply want to enhance your morning coffee, this ultimate guide will equip you with the skills and knowledge necessary to master homemade whipped cream.
Essential Ingredients for Whipped Cream
Whipped cream is a delightful topping that adds a creamy touch to desserts and beverages. Making it is simple, requiring just a few essential ingredients. Below is a list along with a brief description:
- Heavy Cream: The main ingredient, heavy cream, has a high-fat content of around 36% or more. This gives whipped cream its thick and fluffy texture.
- Sugar: Granulated or powdered sugar is used for sweetness. It can be adjusted based on personal preference.
- Vanilla Extract: A small amount of vanilla extract enhances the flavor, giving the whipped cream a fragrant aroma.
Here’s a quick reference table:
| Ingredient | Purpose |
|---|---|
| Heavy Cream | Provides texture and volume |
| Sugar | Adds sweetness |
| Vanilla Extract | Adds flavor |
To make whipped cream, chill the mixing bowl and beaters. Then, whisk the heavy cream until soft peaks form. Add sugar and vanilla, and continue beating until stiff peaks appear. This delightful topping pairs perfectly with cakes, pies, and hot drinks like cocoa. Enjoy experimenting with these simple ingredients to elevate your desserts!
Different Types of Cream: Heavy Cream vs. Whipping Cream
When it comes to creating delightful desserts, understanding the differences between heavy cream and whipping cream is key. Both types are versatile and add richness to many recipes. Here’s a quick comparison:
| Feature | Heavy Cream | Whipping Cream |
|---|---|---|
| Fat Content | 36% or more | 30% to 36% |
| Stability When Whipped | More stable | Less stable |
| Ideal for | Sauces, soups, and thick creams | Light toppings and fillings |
Heavy Cream
Heavy cream contains at least 36% milk fat. Its higher fat content makes it an ideal choice for thickening soups and creating rich sauces. It holds its shape well when whipped, making it perfect for piping on desserts.
Whipping Cream
Whipping cream, on the other hand, has a lower fat content, ranging from 30% to 36%. It whips up quickly and adds a lighter touch to desserts like mousses and pies. However, it does not hold its shape as firmly as heavy cream.
In summary, choose heavy cream for robust, thicker applications and whipping cream for airy, softer treats.
Tools You Will Need for Whipping Cream
Whipping cream is a delightful task if you have the right tools. Here’s a list of what you’ll need:
- Mixing Bowl
- Use a stainless steel or glass bowl for best results.
- Chill the bowl in the fridge before use for faster whipping.
- Whisk or Electric Mixer
- A balloon whisk works well for small amounts.
- An electric mixer is efficient for larger quantities. Choose a stand mixer with a whisk attachment if possible.
- Measuring Cup
- Accurate measurement of cream ensures the right consistency.
- Use a liquid measuring cup for precision.
- Spatula
- A rubber spatula helps fold in any flavors or adjust the texture.
- Useful for scraping the bowl clean.
Here is a simple table to summarize:
| Tool | Purpose |
|---|---|
| Mixing Bowl | Keep cream cold and mix evenly |
| Whisk/Mixer | Beat cream to desired thickness |
| Measuring Cup | Measure cream accurately |
| Spatula | Fold flavors, scrape the bowl |
Having these tools makes the process smooth and enjoyable. With the right equipment, you’ll achieve fluffy whipped cream every time!
Preparing Your Equipment for Optimal Whipping
To make perfect whipped cream, preparation is key. Start by chilling your mixing bowl and beaters in the freezer for about 15 minutes. Cold equipment helps whipped cream thicken faster and hold its shape longer.
Here’s a simple checklist to ensure you’re ready:
- Mixing Bowl: Preferably metal, as it retains cold best.
- Beaters/Whisk: Also chilled for optimal results.
- Heavy Cream: Should be cold, straight from the fridge.
- Optional Additions: Sugar and vanilla extract at room temperature.
Using proper tools can make a big difference. Here’s a quick comparison table to help choose:
| Tool | Pros | Cons |
|---|---|---|
| Electric Mixer | Fast, efficient, easy on the arms | Over-whipping risk if not careful |
| Hand Whisk | Great for small batches, more control | Time-consuming, requires effort |
Always start at a low speed, gradually increasing. This prevents splattering and allows cream to whip evenly. Once soft peaks form, be patient— go slow and steady to prevent over-whipping.
With the right equipment and techniques, your whipped cream will be luscious and perfect every time.
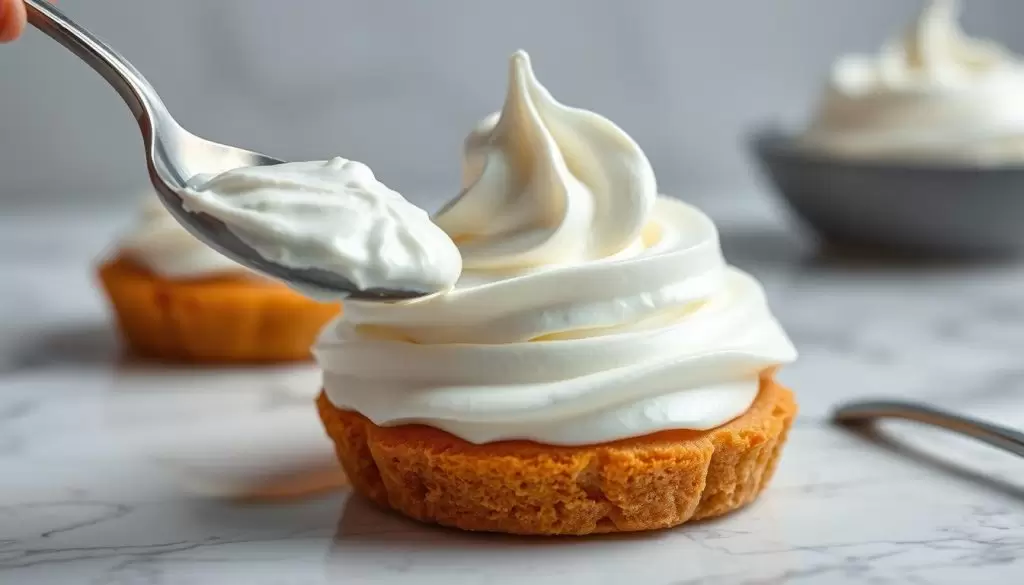
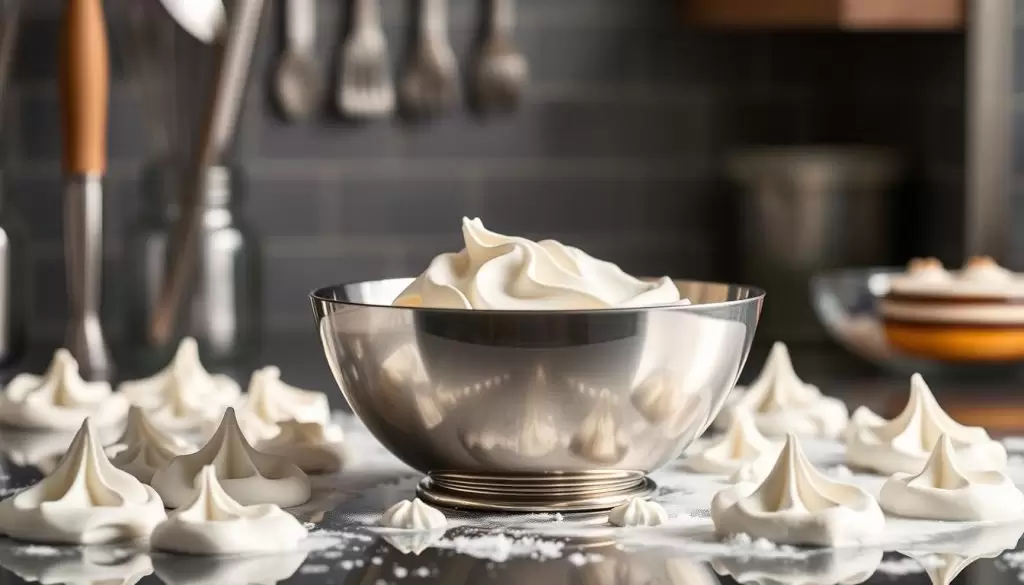
Understanding the Stages of Whipped Cream: Soft, Medium, and Stiff Peaks
Whipped cream is a delightful addition to many desserts, but achieving the right consistency can make all the difference. Understanding the stages of whipped cream is key to mastering its use.
Stages of Whipped Cream
| Stage | Description |
|---|---|
| Soft Peaks | The cream forms gentle peaks that curl over when the beater is lifted. It’s perfect for topping pies and adding to drinks. |
| Medium Peaks | The peaks become slightly firmer but still have a nice curve. This stage is great for frosting cakes. |
| Stiff Peaks | The cream holds its shape without drooping. This is ideal for piping designs and more structured desserts. |
Tips for Perfect Whip
- Chill Everything: Keep your bowl and beaters cold.
- Be Patient: Don’t rush. Beat at a steady, moderate speed.
- Check Often: Stop beating to test the peaks; it’s easy to over-whip.
Remember, each stage serves a different purpose, enhancing both texture and presentation. Practice makes perfect, and soon, you’ll be crafting delightful treats with just the right touch of whipped cream.
How to Whip Cream by Hand vs. Using an Electric Mixer
Whipping cream can transform a simple dessert into something delightful. There are two popular methods to whip cream: by hand or using an electric mixer. Both have their pros and cons.
Whipping Cream by Hand:
- Requires a chilled bowl and whisk.
- Good arm workout due to manual effort.
- Offers better control over the texture.
- Takes about 10-15 minutes.
Whipping Cream Using an Electric Mixer:
- Uses a chilled bowl and beaters.
- Provides fast results in 3-5 minutes.
- Less physical effort required.
- Risk of over-whipping if not monitored.
| Method | Time | Control | Effort | Risk of Over-whipping |
|---|---|---|---|---|
| By Hand | 10-15 min | High | High | Low |
| Electric | 3-5 min | Medium | Low | Moderate |
For a small amount of cream, whipping by hand is ideal. If you’re short on time or have a large batch, an electric mixer is more efficient.
Whether you choose hand or electric, remember to keep an eye on the cream to achieve the perfect texture—peaks that hold their shape but still look smooth.
Tips for Keeping Your Cream Cold While Whipping
Whipping cream is best when it’s kept cold. This helps it hold its shape and texture. Here are some tips to ensure your cream stays chilled:
- Chill Your Equipment: Put your bowl and beaters in the fridge or freezer for about 15 minutes before use. Cold tools help keep the cream at the right temperature.
- Use Cold Cream: Make sure the cream has been refrigerated and is well-chilled before whipping. Aim for a temperature of around 35°F (1.7°C).
- Ice Bath: You can place your mixing bowl in a larger bowl filled with ice and water. This extra cooling step maintains a consistent cold temperature while mixing.
- Work Quickly: Once you start whipping, work briskly. The longer it sits out, the warmer it gets.
- Refrigerate Between Steps: If you need to pause during the process, put the cream back in the refrigerator.
Tip Summary
| Action | Purpose |
|---|---|
| Chill Tools | Keeps cream cold while mixing |
| Use Cold Cream | Best starting temperature |
| Ice Bath | Maintains cold temp |
| Work Quickly | Prevents warming |
| Refrigerate Pauses | Keeps cream cold |
Following these steps ensures perfect whipped cream every time!
When to Add Sweeteners for Best Flavor
When adding sweeteners to whipped cream for the best flavor, timing is key. Here are some tips to make sure your whipped cream tastes just right:
- Early Mixing: Start mixing the cream on a slow speed before adding any sweeteners. This helps to incorporate air and ensures even consistency.
- Add Sweeteners Midway: Once the cream starts to thicken but is not fully whipped, add your sweetener of choice. This is usually when the cream forms soft peaks. Adding sugar or other sweeteners at this stage allows better integration.
- Adjust Sweetness: Taste as you go along. This helps to adjust the sweetness to your preference without going overboard.
Here’s a simple table to illustrate:
| Sweetener | Recommended Time to Add | Notes |
|---|---|---|
| Granulated Sugar | Soft Peaks Stage | Ensures smooth blending |
| Powdered Sugar | Soft Peaks Stage | Quick dissolving, smooth texture |
| Honey | Just Before Soft Peaks | May affect whipping speed |
| Vanilla Extract | Along with Sweetener | Adds flavor depth to the cream |
Remember, the ultimate goal is a silky, flavorful whipped cream that lifts any dessert.
Addressing Common Issues: Over-Whipping and How to Fix It
Whipped cream is a versatile and delightful topping, but over-whipping can turn it grainy and stiff. Understanding how to fix this common issue is key to achieving perfect cream.
Common Issues
1. Over-Whipping:
- Creates a texture similar to butter.
- Becomes too stiff, losing its smoothness.
Steps to Fix Over-Whipped Cream
- Identify the Issue: If the cream looks thick and irregular, it’s likely over-whipped.
- Add Liquid Cream: Pour a small amount of unwhipped cream into the mix. This helps restore the desired consistency.
- Gently Whisk: Use a hand whisk instead of an electric mixer. Stir slowly to prevent further over-whipping.
- Check Consistency: Stop once the cream regains a soft, fluffy texture.
Tips to Avoid Over-Whipping
- Use Cold Ingredients: Cold cream whips more evenly.
- Monitor Constantly: Stop beating as soon as peaks form.
- Opt for Low Speed: Slower speeds help control texture.
By following these tips, you can enjoy perfectly whipped cream every time!
Flavoring Options for Homemade Whipped Cream
Whipped cream is a versatile dessert topping that can be easily flavored to suit your taste. Here are some fun options to jazz up your homemade whipped cream:
Flavoring Options:
- Vanilla: Add 1 teaspoon of vanilla extract for a classic taste.
- Cocoa: Mix in 1 tablespoon of cocoa powder for a chocolate twist.
- Cinnamon: Stir in 1 teaspoon for a warm and spicy kick.
- Almond: Use 1/2 teaspoon of almond extract for a nutty flavor.
- Lemon Zest: Add 1 teaspoon of lemon zest for a citrus punch.
Conversion Table for Flavoring Ingredients:
| Flavor | Amount |
|---|---|
| Vanilla | 1 tsp |
| Cocoa | 1 tbsp |
| Cinnamon | 1 tsp |
| Almond | 1/2 tsp |
| Lemon Zest | 1 tsp |
Adding these flavors is simple. Just fold them into the cream as you whip it. This way, you can create a tasty topping that fits any dessert.
Feel free to mix and match these flavors to create your own unique version. Whipped cream can be as versatile as your imagination allows!
Recipes That Pair Well with Whipped Cream
Whipped cream is a versatile topping that enhances many dishes. Here are some delicious recipes that pair well with it:
- Classic Pancakes
Whipped cream adds a delightful fluffiness on top of warm pancakes. Try adding fresh fruits like strawberries or blueberries for an extra burst of flavor. - Hot Chocolate
A dollop of whipped cream melts perfectly into a warm mug of hot cocoa, providing a sweet contrast to the rich chocolate. - Chocolate Cake
Use whipped cream between cake layers or on top for a light, creamy texture that enhances each bite. - Pies
Particularly for pumpkin or apple pies, whipped cream is the perfect finish. The creamy texture balances the spiced fillings. - Fruit Salad
Mix a little whipped cream into a fresh fruit salad to create a creamy dessert that’s both healthy and indulgent.
Comparison Table:
| Dish | Reason for Pairing |
|---|---|
| Pancakes | Adds fluffiness and complements fruits |
| Hot Chocolate | Melts into the drink for sweetness |
| Chocolate Cake | Enhances texture and adds creaminess |
| Pies | Balances spiced fillings |
| Fruit Salad | Healthy yet indulgent combination |
Experiment with these pairings to elevate your desserts!
How to Make Stabilized Whipped Cream
Making stabilized whipped cream is simple and keeps it fluffy for longer.
Ingredients Needed:
- 1 cup heavy cream
- 2 tablespoons powdered sugar
- 1 teaspoon vanilla extract
- 1 tablespoon cornstarch or gelatin (as a stabilizer)
Steps:
- Chill Everything: Place your mixing bowl and beaters in the fridge for about 15 minutes. Cold tools make whipping easier.
- Start Mixing: Pour the heavy cream into the chilled bowl. Begin whipping at medium speed.
- Add Flavors: Once the cream thickens a bit, add the powdered sugar and vanilla extract.
- Stabilize: To keep the whipped cream firm, gently fold in cornstarch or dissolved gelatin.
- Whip Until Stiff Peaks: Continue whipping until stiff peaks form. This means when you lift the beaters, the cream stands up without falling.
Quick Tips:
- Use fresh heavy cream for best results.
- Stabilized whipped cream can last up to 2 days in the fridge.
Use this stabilized version for cakes, pies, or any dessert that needs a creamy topping. Enjoy the perfect dollop every time!
Storage Tips for Homemade Whipped Cream
Storing homemade whipped cream properly is key to keeping it fresh and fluffy. Here are some tips to help you do just that:
- Refrigerate Promptly: After making whipped cream, place it in an airtight container and refrigerate immediately. This helps maintain its texture and prevents spoilage.
- Use Fresh Ingredients: Use fresh cream and sugar. This makes the whipped cream last longer and taste better.
- Shelf Life: Homemade whipped cream typically lasts about 2 to 3 days in the fridge before it starts losing its shape and freshness.
- Avoid Freezing: While it’s possible to freeze whipped cream, it may change the texture. If you must freeze it, form dollops on a baking sheet and freeze until solid. Then, transfer them to a freezer-safe bag.
- Re-Whip if Needed: If the cream loses volume, gently re-whip it for a few seconds to restore its fluffiness.
Storage Tips
| Storage Method | Shelf Life |
|---|---|
| Refrigerator (2-3 days) | Best for freshness |
| Freezing (optional) | Texture may change |
Remember, whipped cream is best enjoyed fresh. Always check for any changes in smell or texture before using it again.
Can Homemade Whipped Cream Replace collapsargas?
Homemade whipped cream can be a great replacement for Cool Whip.
Key Differences:
| Aspect | Homemade Whipped Cream | Cool Whip |
|---|---|---|
| Main Ingredients | Heavy cream, sugar, vanilla | Water, corn syrup, hydrogenated oils |
| Texture | Light and airy | Thicker and more stable |
| Shelf Life | Short, best fresh | Longer, lasts weeks |
| Taste | Rich and creamy | Sweeter, less creamy |
Pros of Homemade Whipped Cream:
- Fresher Taste: Made with real cream, it offers a richer flavor.
- Natural Ingredients: No artificial additives or preservatives.
- Customizable: You can adjust sweetness and flavors to taste.
Cons:
- Shelf Life: Needs to be prepared just before using or stored, though it can last in the fridge for a few days.
- Stability: May not hold shape as long, especially in warm weather.
In conclusion, homemade whipped cream is a tasty and natural choice, offering more control over flavors and ingredients. However, for convenience and longevity, Cool Whip is a reliable alternative.
Frequently Asked Questions
Can I use milk instead of cream?
Milk alone won’t whip like heavy cream because it doesn’t have enough fat. However, you can try mixing milk with melted butter to mimic cream. Use one-third cup of butter with three-fourths cup of milk as a substitute for one cup of heavy cream. This mixture can work in recipes, but it may not whip up as fluffy.
How long does homemade whipped cream last?
Homemade whipped cream is best when used fresh. It can last in the fridge for two to three days in an airtight container. Remember, it might lose some volume and texture over time. If it starts to separate, give it a gentle whisk before using.
Why is my whipped cream grainy?
Grainy whipped cream usually happens when it’s been whipped too long. The cream turns into butter-like lumps if overbeaten. To avoid this, stop whipping as soon as soft peaks form. If it becomes grainy, you can try adding a bit more cream and gently folding it in by hand.
How can I make flavored whipped cream?
Adding flavors to whipped cream is easy! Just mix in a teaspoon of vanilla extract or other flavor extracts while whipping. You can also add a tablespoon of cocoa powder for chocolate whipped cream. For a fruity touch, try folding in a few teaspoons of fruit puree or zest after whipping.
Is there a dairy-free option for whipped cream?
Yes, dairy-free whipped cream options are available. Coconut cream is a popular choice. Chill a can of coconut milk overnight, scoop out the solid cream, and whip it up. You can also find almond, soy, and cashew-based whipped cream products in many grocery stores. These offer similar textures without the dairy.
Can I use milk instead of cream?
Whipped cream is a delightful addition to many desserts. But, what if you don’t have any cream? Can you use milk instead?
Well, whipping milk to create a similar texture as cream is tough. Milk doesn’t have enough fat to hold air and maintain its shape like cream does. However, you can still make a whipped topping using milk if you add a thickening agent.
Here’s a simple table comparing cream and milk:
| Feature | Cream | Milk |
|---|---|---|
| Fat Content | High | Low |
| Whippability | Easily whipped | Rarely whips |
| Texture | Thick and rich | Thin |
To mimic whipped cream, try this method using milk:
- Chill milk: Place milk and a mixing bowl in the freezer for about 15 minutes.
- Use a stabilizer: Add gelatin or cornstarch to thicken.
- Whip it up: Use a mixer at high speed until peaks form.
While the result won’t be as fluffy as real whipped cream, it’s a handy alternative in a pinch.