Creating perfectly textured whipped cream can be a frustrating challenge in any kitchen. Many home cooks experience results that are too runny, overly dense, or even taste slightly metallic. The root of these issues often lies in the delicate science behind the cream dispenser.
Success hinges on understanding the relationship between fat content in your heavy cream and the solubility of nitrous oxide gas. Professional bakers, like one in Portland, use simple tests—such as observing how slowly cream slides on a tilted plate—to verify this critical consistency before charging.
The purity of your gas supply is the most significant factor for achieving a stable, pillowy foam. A high-quality charger ensures proper infusion and prevents off-flavors. Mastering the technique for your whipper transforms simple ingredients into café-style masterpieces.
This guide provides professional insights into the mechanics of your tool. You will learn how to avoid common pitfalls and achieve a reliable, luxurious texture for all your culinary creations.
Key Takeaways
- The fat content in your cream directly affects how well it holds gas and foam.
- Pure nitrous oxide chargers are essential for stable texture and clean taste.
- Proper shaking technique ensures even gas distribution throughout the liquid.
- Simple consistency tests, like the tilted plate method, can prevent failures.
- Understanding your dispenser’s mechanics is key to consistent results.
- Avoid runny or dense outcomes by following a few expert steps.

Introduction to Whipped Cream Dispensers and Quality Gas
The secret to that cloud-like foam atop your favorite dessert isn’t magic—it’s precise engineering. A whipped cream dispenser, often called a siphon, is the key tool. It transforms liquid cream into a stable, airy foam through controlled gas infusion.
Understanding the Function of a Whipped Cream Dispenser
This device is more than a simple canister. Its primary role is to maintain high internal pressure. This pressure forces nitrous oxide gas to dissolve directly into the fat molecules of the heavy cream.
The process creates thousands of tiny, stable bubbles. The result is that light, airy texture everyone loves. A well-maintained siphon ensures this happens consistently every time.
The Importance of High-Quality, Food-Grade N2O
The type of gas you use is critical. Professionals rely on pure, food-grade nitrous oxide (N2O). Unlike CO2, which can create a fizzy, acidic result, N2O is highly soluble in fat.
This solubility makes it the industry standard. High-quality gas ensures proper expansion and a clean, neutral taste. Inferior chargers can introduce impurities that ruin the flavor and texture of your final product.
Always choose chargers designed specifically for culinary use. Your whipped cream’s quality depends on it.
Ingredients & Equipment: The Foundation for Consistent Results
Professional chefs know that consistent culinary results are built on two pillars: premium ingredients and reliable equipment. Your whipped cream’s final texture is largely decided before you even charge the tool.
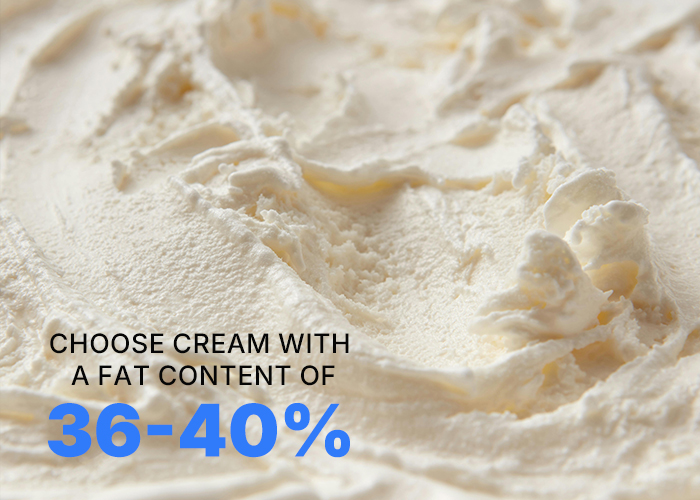
Selecting the Right Cream with Optimal Fat Content
Heavy whipping cream with 36-40% fat is the gold standard. This high fat content provides the necessary structure for a stable, full foam.
Avoid ultra-pasteurized options. The high-heat processing can weaken the cream’s protein network.
Test your cream’s density before use. A Portland bakery owner pours a small amount on a tilted plate. Heavy cream slides slowly, while light cream runs like water.
Essential Tools and Collapsar Product Overview
Your primary equipment is the siphon, or cream dispenser. Invest in a high-quality stainless steel model.
Stainless steel offers superior durability and temperature retention compared to aluminum. This is critical for maintaining your food at the right consistency.
Proper preparation of your ingredients and using the right siphon ensures your cream performs perfectly every time.
Best Way to Shake a Cream Whipper for Consistent Texture Every Time
Six to eight firm shakes might sound specific, but this range is the industry standard for a reason. The action you take after charging your dispenser is the final, decisive factor for your texture.
This step ensures the gas is fully integrated into the liquid. A proper shake creates a uniform, stable foam.
Proper Shaking Techniques to Achieve Uniform Texture
Immediately after inserting the charger, hold your siphon firmly. Shake it vertically 6 to 8 times with conviction.
This motion distributes the nitrous oxide evenly. The goal is emulsification, not aeration.
As one pastry chef notes,
“The shake is not about force. It’s about consistent, firm movements to marry the gas to the fat.”
Common Shaking Mistakes and How to Avoid Them
Two primary errors ruin whipped cream. Over-shaking agitates the cream too much.
This breaks the fat structure, creating a dense, rubbery result. Under-shaking fails to mix the gas fully.
This leads to a thin, runny output that collapses. The table below clarifies these outcomes.
| Shaking Method | Resulting Texture | Primary Cause |
|---|---|---|
| Under-Shaking (1-3 times) | Thin, runny foam | Insufficient gas emulsification |
| Ideal Shaking (6-8 firm times) | Light, stable foam | Even nitrous oxide distribution |
| Over-Shaking (10+ times) | Dense, rubbery texture | Excessive agitation breaks fat |
Balance is key. Pair the correct number of shakes with cold ingredients for a professional finish every time you use your siphon.
Step-by-Step Charging Techniques Using Collapsar
The moment you introduce gas into your siphon determines whether your foam will stand tall or fall flat. Proper charging is a precise sequence that guarantees best results.
It ensures the nitrous oxide fully integrates with your cream. This step is crucial for achieving the desired texture from your dispenser.
How to Select the Correct Charger and Tank Size
Your dispenser size dictates the number of chargers required. A one-liter unit typically needs two standard 8g cream charger cartridges.
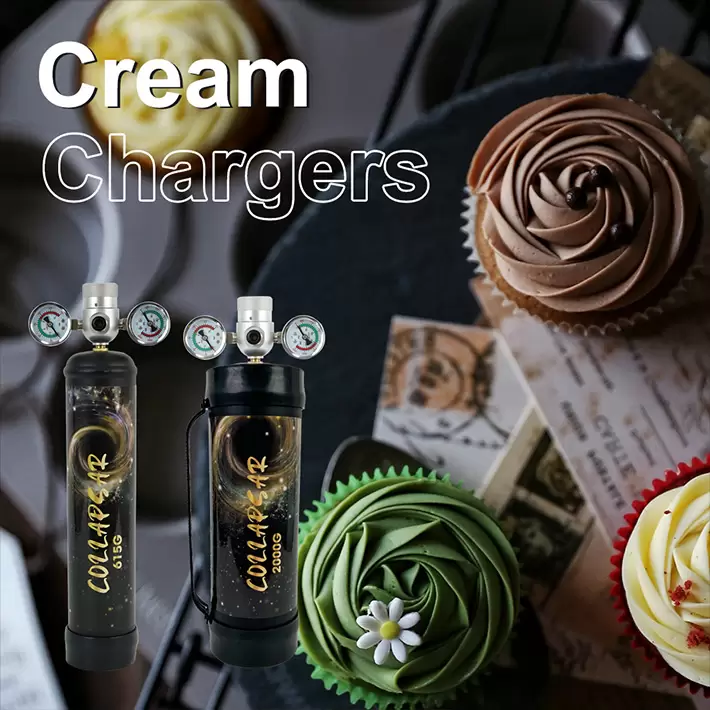
A larger 2.0L system often requires three for optimal pressure. For home kitchens, the Collapsar 1L 615G tank is an excellent choice.
Bigger operations benefit from the Collapsar 2.2L 1364G. The Collapsar 3.3L 2000G is for high-volume professional use.
This larger tank offers significant cost savings over small cartridges.
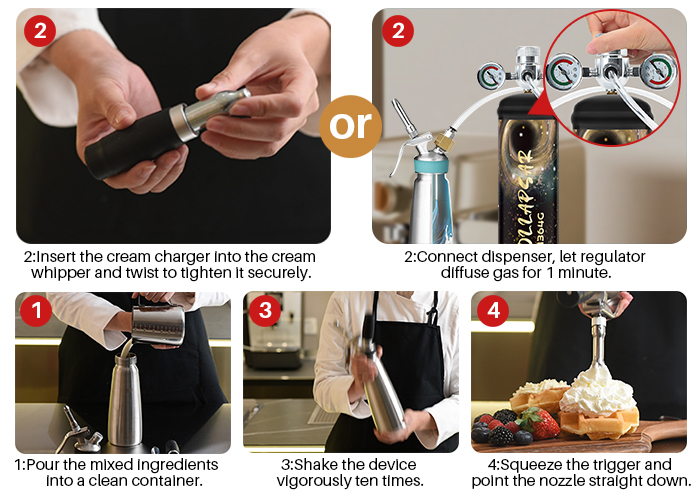
Executing the Charging Sequence for Best Results
First, secure the head onto your siphon firmly. Attach the charger and introduce the gas.
Listen for a brief hiss. This sound confirms successful pressure transfer.
Always use the correct number of chargers for your model. Under-charging is a common cause of watery output.
After charging, wait 30 to 60 seconds. This allows the gas to dissolve completely into the cream.
Then, you can dispense your first perfect portion.
Temperature Control and Its Impact on Cream Whipping
Achieving a professional-grade texture requires mastering one critical variable: temperature.
Cold conditions allow fat molecules in your cream to properly trap nitrous oxide gas. This creates a stable, luxurious foam structure.
Optimal Temperature Ranges for Cream and Dispensers
Your cream and the dispenser body need chilling to 35°F-40°F (2°C-4°C). Warm ingredients fail to absorb gas efficiently.
The result is unstable, runny output. The table below shows how temperature affects your final product.
| Condition | Cream & Siphon Temp | Likely Result |
|---|---|---|
| Too Warm | Above 45°F (7°C) | Runny, flat foam; gas releases too fast |
| Ideal Range | 35°F-40°F (2°C-4°C) | Stable, light texture with proper hold |
| Over-Chilled | Below 32°F (0°C) | Dense output; fat may begin to crystallize |

Tips for Keeping Your Ingredients Cold
Store your empty siphon in the refrigerator for 20-30 minutes before use. This pre-chills the metal.
If you’re short on time, run cold water over the stainless steel body. A professional baker shared this quick method.
“Running cold water over the exterior of your siphon is my go-to trick. It lowers the temperature rapidly for stable foam.”
Never charge warm cream. The gas will create excessive pressure and release immediately.
Consistent chill is the secret. It lets fat remain firm enough to trap gas bubbles effectively in your dispenser.
Utilizing Collapsar Products for Professional Quality
Many chefs overlook a critical component that directly impacts taste: gas quality. Your premium cream and stainless steel dispenser can only perform as well as the nitrous oxide you use.
True professional results demand gas free from the impurities found in standard industrial chargers.
Overview of Collapsar Tank and Charger Options
Collapsar provides a scalable system. You can choose from precision chargers for home use to high-capacity tanks for commercial kitchens.
For businesses, the COLLAPSAR Wholesale program offers reliable access to these larger tanks. This ensures you never compromise on consistency, even during high-volume service.
Benefits of Using Processed Gas Without Impurities
The unparalleled quality comes from superior processing. An inline, copper-core 1-micron filter captures fine metal shavings and machine oils.
These contaminants are often caused by low-quality manufacturing. They can ruin the flavor of your cream with a metallic aftertaste.
Removing them results in a more pure and delicate taste. Your whipped cream and culinary foams achieve a perfectly neutral, clean profile.
This processed gas also prevents clogging in your siphon nozzle. It protects your equipment and guarantees smooth, consistent dispensing every time.
Choosing Collapsar is an investment in flavor integrity. It ensures your foam is always light, stable, and professionally refined.
Enhancing Flavor and Texture with Additives
The key to infusing taste without ruining texture lies in understanding your additives. While plain whipped cream is a classic, incorporating flavors opens new culinary doors.
You must select your ingredients with care. Each addition impacts the final structure of your foams.
Incorporating Flavors Without Compromising Texture
Always use powdered sugar instead of granulated. Fine powder dissolves completely and won’t clog the delicate nozzle or valve.
Granulated sugar crystals can jam the mechanism. This leads to inconsistent dispensing from your siphon.
For flavors like vanilla extract or cocoa powder, strain the mixture first. Remove any solid particles before filling the canister.
Liquid additions should be minimal. Too much volume dilutes the fat percentage in your cream.
A weakened fat structure cannot trap gas effectively. Your foam will collapse quickly.
If using alcohol, such as a liqueur, keep it under 10% of the total volume. Higher concentrations interfere with gas dissolution.
This careful preparation lets you experiment boldly. You can achieve complex profiles while maintaining a professional, stable texture for your whipped cream.
Maintaining Your Whipped Cream Dispenser for Longevity
A well-maintained whipped cream dispenser is a reliable partner for years of culinary creativity. Consistent care prevents performance issues and protects your investment. This routine involves simple daily actions and a more thorough weekly process.
Daily Cleaning Best Practices
After each use, rinse the nozzle and gasket with warm water immediately. This prevents dried cream residue from building up inside the small passages. A clean seal ensures proper pressure retention for your next batch.
This quick cleaning step is the most important for daily upkeep. It keeps all parts of your siphon functioning smoothly.
Weekly Deep Cleaning and Maintenance Tips
Once a week, disassemble all parts of your siphon completely. Use a small brush to scrub the valve and nozzle passages thoroughly. This removes any hidden residue that rinsing might miss.
Always inspect the silicone gasket for signs of wear or cracks during this deep clean. A faulty seal is the most common reason for pressure loss in a dispenser.
A charged unit can be stored in the refrigerator for up to ten days if kept sealed and clean. Never place your stainless steel whipped cream tool in the dishwasher unless the manufacturer explicitly states it is safe. This avoids damage to the finish and internal components.
Troubleshooting Common Whipped Cream Issues
When your foam doesn’t hold its shape, a few key checks can restore perfect results. Most texture problems stem from simple, correctable causes. A systematic approach quickly identifies whether the issue is with your cream, gas, or technique.
Fixing Runny or Inconsistent Output
Runny whipped cream often points to insufficient fat or low pressure. First, verify your cream has at least 30% fat content. Then, ensure you used the correct number of chargers for full gas infusion.
Sputtering occurs if the dispenser isn’t fully inverted. Hold the siphon completely upside down so the liquid is at the nozzle. This allows proper aeration.
If the lever feels stiff or nothing releases, a clogged nozzle tip may be the culprit. Rinse it thoroughly with warm water to clear any dried residue.
Addressing Dense or Rubber-Like Texture Problems
A dense, rubbery texture usually comes from over-shaking the canister. This breaks the foam’s delicate structure. Limit shakes to the recommended 6-8 firm motions.
Also, check the valve for residue if pressure seems low. Ensure the charger holder is tightened completely to puncture the seal. A misaligned gasket can also cause gas to leak from the head.
Following these steps saves time and frustration. Your whipped cream will return to a light, stable consistency from your dispenser.
Exploring Versatility: Beyond Whipped Cream
The versatility of a stainless steel siphon extends far beyond dessert toppings into the realm of gourmet cuisine. This tool unlocks a world of modern culinary techniques for any home kitchen.
You can create professional-grade foams and mousses that elevate the presentation of any meal.
Creating Foams, Mousses, and Infused Culinary Creations
Move past basic whipped cream. Your dispenser can produce savory truffle-infused potato foams or light, airy chocolate mousses.
These applications demonstrate the significant difference a high-quality tool makes. Always strain your mixture thoroughly.
This prevents solid particles from clogging the delicate nozzle. For sweet foams, consider adding a touch of vanilla powder instead of liquid extract.
Innovative Uses for Your Whipped Cream Dispenser
One remarkable use is rapid infusion. You can create flavored oils or vinegars in minutes, not days.
The pressure inside the siphon forces flavors into the liquid base. This is a game-changer for food preparation.
A key maintenance tip is to use a small cleaning brush after each use. This ensures you can switch between sweet and savory applications without cross-contaminating flavors.
Your stainless steel dispenser is a versatile powerhouse for creative food artistry.
Conclusion
Mastering your cream dispenser unlocks a world of culinary possibilities, from desserts to savory foams. It requires attention to detail, from selecting high-fat cream to using pure nitrous oxide.
By following proper charging and shaking techniques, you achieve professional results. Your whipped cream will be consistent, stable, and delicious every single time.
Regular cleaning of the siphon parts ensures your equipment lasts. This protects your food preparations and maintains safety line standards.
Whether you’re a home cook or a professional chef, creating light foams in seconds is a game-changer. We hope these tips make a significant difference in your kitchen.
FAQ
Why is shaking my whipped cream dispenser so important?
Shaking is crucial for creating a consistent, smooth texture. It evenly distributes the nitrous oxide gas throughout the cold cream, ensuring every particle is aerated. Without proper agitation, you risk a separated, runny, or dense output from your cream dispenser.
What is the correct technique for shaking a cream whipper?
Hold the stainless steel canister firmly with both hands. Tilt it at a 45-degree angle and use short, sharp, horizontal shakes—like shaking a cocktail shaker. Do this for about 10-15 seconds after charging. This motion integrates the gas without creating large, unstable air bubbles.
Can I use any type of gas charger in my dispenser?
No. You must only use high-quality, food-grade nitrous oxide chargers, like those from Collapsar. These are designed for culinary use and are free of impurities that can affect taste and safety. Never use industrial or non-food-grade gas in your kitchen equipment.
How does temperature affect my whipped cream results?
Temperature is critical. All ingredients and the dispenser itself should be very cold, ideally below 40°F. Cold cream holds the gas better, yielding a stiffer, longer-lasting foam. If the components are warm, the fat can’t stabilize the air particles, leading to a soupy texture.
How often should I clean my whipped cream dispenser?
Perform a quick rinse with warm water after each use. A full disassembly and deep clean with a soft brush and mild soap is recommended weekly. Always dry all parts, including the gasket and nozzle, thoroughly to prevent bacteria growth and maintain the valve function.
My cream is coming out runny. How can I fix this?
Runny output often stems from warm ingredients, under-charging, or insufficient shaking. Ensure everything is chilled, use a full, fresh cream charger, and employ the proper shaking method. Also, check that your cream has a high enough fat content (36% or more) for optimal structure.
What can I make besides whipped cream with this equipment?
Your siphon is incredibly versatile! You can create savory foams, dessert mousses, infused liquid espumas, and even carbonated fruits. The Collapsar system allows for consistent pressure to experiment with various food textures, from light airs to dense spreads.
How do I store a charged dispenser, and for how long?
A> Store a charged canister in the refrigerator, nozzle up. For food safety and peak texture, dispense the contents within 3-5 days. The pressure inside will remain stable during this time if the canister is kept cold and the lever and head seals are intact.